How to Build a Retaining Wall with Blocks: Top 5 Tips
Why Building a Retaining Wall is a Smart Move
When it comes to landscape features, retaining walls are a practical and visually appealing solution. They prevent soil erosion, create usable spaces from slopes, and can significantly improve your garden’s aesthetics. If you’re searching for “how to build a retaining wall with blocks,” look no further. This guide from Marchi Paving Inc. will walk you through the process, making it a feasible DIY project for both homeowners and property managers alike.
Here’s a quick summary if you’re in a hurry:
- Level the Ground: Measure, excavate, and level the desired area.
- Lay the Base: Spread and level a layer of coarse sand or gravel.
- Set the First Block: Start from one end and ensure it’s perfectly level.
- Complete the First Course of Blocks: Continue laying and leveling each block.
- Set the Next Courses: Offset seams and continue building upwards.
- Final Touches: Add capstone blocks and backfill with gravel.
By following these steps, you can create a retaining wall that not only holds the soil in place but also becomes a beautiful focal point in your yard.

Planning Your Retaining Wall
Before you jump into building a retaining wall, careful planning is essential. This section covers everything you need to know about location, materials, drainage, and measuring to ensure your project is a success.
Choosing the Right Materials
Selecting the right materials is crucial for a sturdy and long-lasting retaining wall. Here are your options:
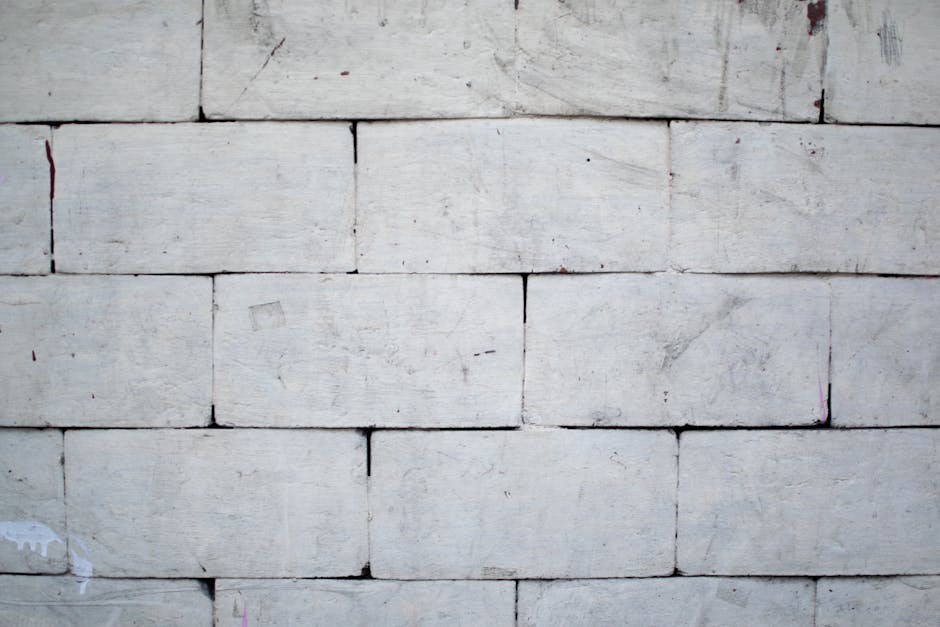
Concrete Blocks: These are a popular choice for beginners. They are easy to stack and come with locking features like lips or pins, which help keep the wall stable.
Interlocking Blocks: These blocks have built-in features that make them easy to align and stack. They can be used to build walls up to 24 to 36 inches high, depending on the block size.
Wood: For smaller walls, wood can be an economical and visually appealing option. However, it may not last as long as other materials.
Bricks and Natural Stones: These materials offer a classic look but can be more challenging to work with. They require precise alignment and may need mortar for stability.
Understanding Drainage Requirements
Proper drainage is essential to prevent your retaining wall from failing. Here’s what you need to know:
Drainage Pipe: Install a perforated drainage pipe behind the first course of blocks. This helps to channel water away from the wall, reducing pressure.
Gravel Backfill: Use gravel to fill the space behind the wall. This allows water to drain freely and reduces soil pressure.
Well-Draining Soil Mix: Avoid using clay or other non-draining soils behind your wall. A well-draining soil mix will help keep your wall stable.
Soil Pressure: That soil becomes heavier when saturated with water. Proper drainage helps to manage this pressure and extend the life of your wall.
Measuring and Estimating Materials
Accurate measurements ensure you buy the right amount of materials, saving you time and money.
Length and Height: Measure the total length and desired height of your wall. This will help you determine how many blocks you need.
Number of Blocks: Divide the total length of the wall by the length of one block to find out how many blocks you need per row. Then, divide the height of the wall by the height of one block to get the number of rows.
Extra Materials: Always buy 10% more blocks than your estimate. This accounts for breakage, cutting, and future repairs.
Local Store Inspiration: Visit your local home improvement store to see different block styles and colors. This can give you ideas for your project and help you make informed decisions.

Safety Tips
Safety should be a priority when building a retaining wall:
- Wear Protective Gear: Always wear gloves, safety glasses, and a back support belt if necessary.
- Check Local Codes: Ensure you comply with local building codes and HOA regulations. A permit may be required, especially for walls over 4 feet tall.
- Avoid Downspouts: Make sure downspouts are not directed at the retaining wall to prevent water buildup.
With these tips, you’re ready to move on to the next step—preparing the ground for your retaining wall project.
Preparing the Ground
Before you can start building your retaining wall, you need to prepare the ground. This involves digging a trench, leveling it, compacting the soil, and laying a solid base. Here’s how to do it step-by-step.
Digging the Trench
Start by marking the layout of your wall with stakes and string. This will guide you as you dig.
1. Use a trenching shovel: Begin digging along the marked line. The trench should be twice as wide as a single block and deep enough to bury at least half the height of your first course of blocks plus 3 inches of paver base. Depending on your blocks, this depth could be 4 to 8 inches.
2. Check the depth: Use a measuring tape to ensure the trench is the correct depth. Adjust as needed to account for any slopes by creating steps up or down to keep the top of the wall level.
3. Compact the soil: Once the trench is dug, use a hand tamper or a vibrating plate compactor to compact the soil. This helps create a stable foundation.
Laying the Base
A solid base is crucial for the longevity of your retaining wall. Here’s how to lay it properly:
1. Select the right gravel: Choose gravel with stones sized between 1/2-inch and 3/4-inch. Crushed stone is preferred over rounded stones like pea gravel because it provides better drainage and stability.
2. Pour the gravel: Fill the trench with a 2- to 3-inch layer of gravel. Use a rake to evenly distribute the stones.
3. Compact the gravel: Use your hand tamper or plate compactor to compact the gravel. This step is essential to ensure the base is stable and evenly compacted.
4. Level the base: Use a 4 or 6-foot level to check that the bottom of the trench is level lengthwise. A torpedo level can help ensure it is level front to back. Adjust as necessary by adding or removing gravel.
Tips for Success
- Soil Conditions: Ensure the soil at the bottom of the trench is firm and well-drained. Avoid building on wet or unstable soil.
- Compacting Tools: A vibrating plate compactor is more effective for large projects, while a hand tamper works well for smaller areas.
- Gravel Selection: Crushed stone is more effective than naturally occurring gravel as it forms stronger interlocking bonds.
By following these steps, you’ll create a solid foundation for your retaining wall. Next, we’ll move on to laying the first course of blocks, ensuring they are level and stable.
How to Build a Retaining Wall with Blocks
Laying the First Course of Blocks
The first course of blocks is the foundation of your retaining wall. It needs to be perfectly level and stable to ensure the entire wall’s integrity.
1. Block Placement: Start at one end of the trench. Place the first block into the gravel base. Press it down firmly but gently, ensuring it sits stable without displacing the gravel.
2. Leveling: Use a level to check the block in all directions—side to side and front to back. Adjust as needed by adding or removing gravel and tapping the block lightly with a rubber mallet.
3. Aligning Blocks: Lay the next block adjacent to the first. Use a 2×4 and level to ensure it aligns perfectly with the first block. Continue this process until the entire first course is laid. Ensuring each block is level and aligned is crucial; any misalignment will affect the subsequent courses.
4. Backfilling: After you complete the first course, backfill the space between the wall and the landscape with gravel. This improves stability and helps with drainage.
Installing Drainage Systems
Proper drainage is essential to prevent water buildup behind the retaining wall, which can cause it to fail.
1. Perforated Pipe: If your area experiences heavy rains, install a perforated corrugated pipe behind the wall. This pipe should extend the entire length of the wall and drain to an area where water can exit safely.
2. Drain Sleeve: Cover the pipe with a drain sleeve to prevent sediment from clogging it.
3. Gravel Coverage: Pour gravel over the pipe to cover it completely. This helps with water flow and prevents soil from clogging the drainage system.
4. Heavy Rain Considerations: For areas with heavy rainfall, ensure the drainage system is robust. This might include additional pipes or larger gravel beds to handle the water volume.
Building Additional Courses
Once the first course and drainage systems are in place, you can start building additional courses.
1. Staggered Blocks: For strength and stability, lay the next course using a staggered pattern. This means the seams of the blocks in the new course should not align with the seams of the blocks below.
2. Cutting Blocks: For even-numbered courses, you’ll need to cut end blocks in half to maintain the staggered pattern. Use a masonry chisel and hammer or a circular saw with a masonry blade. Always wear eye and ear protection and a dust mask.
3. Landscape Adhesive: Apply landscape adhesive between rows of blocks to secure them. This is especially important for higher walls.
4. Checking for Level: Continuously check each block for level as you go. Use a level and make adjustments with a rubber mallet. This ensures the wall remains straight and stable.
By following these steps, you’ll build a strong and lasting retaining wall. Next, we’ll discuss adding the finishing touches to complete your project.
Finishing Touches
Adding Capstones
Capstones not only complete the look of your retaining wall but also add stability.
1. Brush Off Debris: Before you start, make sure the top layer of blocks is clean. Use a broom to brush off any dust or debris. This ensures the adhesive will bond properly.
2. Adhesive Application: Apply a generous bead of construction adhesive to the top layer of blocks. Make sure the adhesive is evenly spread and covers the entire surface where the capstones will sit.
3. Place Capstones: Carefully place the capstones on the adhesive. Ensure they overhang the retaining blocks by 1 to 1.5 inches for a polished look. Press down firmly to secure them.
4. Check Alignment: Use a level to make sure the capstones are even and aligned. Adjust as necessary before the adhesive sets.
Backfilling and Landscaping
Proper backfilling and landscaping will improve the durability and appearance of your retaining wall.
1. Gravel or Sand Backfill: Start by backfilling the area behind the wall with gravel or sand. If using sand, first cover the backside of the wall with landscape fabric to prevent the sand from seeping through the blocks.
2. Tamping: Shovel the backfill material in small portions and tamp it down as you go. This ensures there are no hollow areas and the material settles completely.
3. Topsoil: Backfill up until slightly below the height of the wall. Fill the remaining space with topsoil, which is ideal for growing grass or other plants. Ensure you use a well-draining soil mix.
4. Planting Grass or Plants: To finish, plant grass or other plants in the topsoil. This not only adds aesthetic value but also helps with soil stabilization.
By following these steps, you’ll create a beautiful, functional retaining wall that improves your landscape. Next, we’ll address some frequently asked questions to help you troubleshoot and perfect your project.
Frequently Asked Questions about Building a Retaining Wall with Blocks
How do you prepare ground for retaining wall blocks?
Proper ground preparation is crucial for a sturdy retaining wall. Here’s a step-by-step guide:
- Trench Depth: Dig a trench deep enough to bury at least half the height of your first course of blocks plus 3 inches of paver base. Depending on block size, this depth could be 4 to 8 inches.
- Trench Width: The trench should be twice as wide as a single block. This provides room for the blocks and backfill material.
- Paver Base: Fill the trench with a 2- to 3-inch layer of paver base. This helps create a stable foundation.
- Compacting: Use a hand tamper or vibrating plate compactor to compact the paver base. A solid, compacted base prevents settling and shifting.
- Leveling: Ensure the trench is level using a 4- or 6-foot level. Check both lengthwise and front to back.
Does a 2-foot retaining wall need drainage?
Yes, even a 2-foot retaining wall requires adequate drainage to maintain its integrity and safety. Here’s why:
- Hydrostatic Pressure: Water that accumulates behind the wall increases pressure, which can push the wall outward or cause it to lean.
- Drainage System: Install a perforated pipe at the base of the wall, covered with gravel. This helps direct water away from the wall.
- Backfill Material: Use well-draining gravel or sand for backfilling. Avoid clay soil as it retains water.
Proper drainage ensures your wall remains sturdy and prevents potential damage from water buildup.
Do retaining wall blocks need to be glued together?
Retaining wall blocks generally do not need to be glued together, especially for lower walls. However, using landscape adhesive can improve stability in certain conditions:
- Landscape Adhesive: Apply adhesive between blocks if you’re building a taller wall or in areas with heavy rainfall or freeze-thaw cycles.
- Weather Conditions: Adhesive helps secure blocks in harsh weather. It’s especially useful for capstones or top courses.
- Block Stability: While interlocking blocks are designed to stay in place, adhesive provides extra security and prevents shifting over time.
By understanding these key points, you can ensure your retaining wall project is both durable and visually appealing. For more detailed steps and expert advice, consult with Marchi Paving Inc.
Conclusion
At Marchi Paving Inc., we pride ourselves on delivering high-quality execution and ensuring the success of every project. Building a retaining wall with blocks requires careful planning, precise execution, and a keen eye for detail—all of which we bring to the table.
High-Quality Execution
Our commitment to quality starts with using the best materials. From premium-grade concrete blocks to top-notch sealants, every project is designed to stand the test of time. We know that a well-built retaining wall not only improves the beauty of your landscape but also provides essential erosion control and additional usable space.
Advanced Equipment
We invest in state-of-the-art equipment to ensure efficiency and precision. Our advanced machinery allows us to complete projects on schedule and within budget, without compromising on quality. This means you get a smooth, durable retaining wall that looks great and functions perfectly.
Project Success
With over 20 years of experience, we have tackled a wide range of retaining wall projects. Our team of highly skilled professionals handles every aspect of the project in-house, allowing us to maintain strict quality control. This extensive experience ensures that we can meet and exceed your expectations, no matter the size or complexity of the project.
When you choose Marchi Paving Inc., you’re not just getting a contractor; you’re partnering with a team dedicated to delivering outstanding results.
Ready to start your project? Contact us today to get a detailed quote and experience the Marchi Paving difference.
